Finishing up the workshop pots
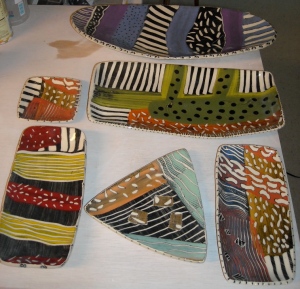
Since I was traveling post-workshop and didn’t want to transport leather or bone dry greenware, I spent some of my time experimenting with layered slip techniques, and then wrapped the slabs in plastic for transport home to my studio. I then used some of my molds to make things when I got back to Florida. Here’s a composite shot of some pieces:
And a closeup of a rectangular plate:
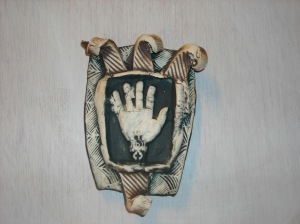
Another technique we learned was for this type of textured, layered tile. I used one of Lana’s hand stamps to make this prototype:
It was bisque fired and then treated with underglaze that was brushed into the textures and wiped off the surface. Fun! I’m working on some imagery to use with this technique… Stay tuned 🙂


The slab pieces look amazing! Wow.
Hi Judy,
There’s no wax. Mainly it’s a white body with layered slips (black on the bottom), then sgrafitto, then the whole slab is rolled with a rolling pin make the slab texture smooth. I think I added some black to the top later of a couple of these. The rolling gives the process a little serendipity… sometimes not what you intended (good or bad) but it does bring out the subtleties and stretches the layers a bit so you get some slivers of color/black outlining your carved marks. Also, the rolling really makes for a great functional surface if you’re making tableware.
Thanks Ann — very cool technique & yours look wonderful!
Your layered slip pieces look fabulous — and isn’t Lana great. I’ve taken a couple of her workshops — but we didn’t do that! I’m curious — have you ‘sgraffito’d’ through layers or added layers on top of each other or a little of both? Are you waxing out before adding a new layer of slip?